Migrate from WinTopas3
Why upgrade to WinTopas4?
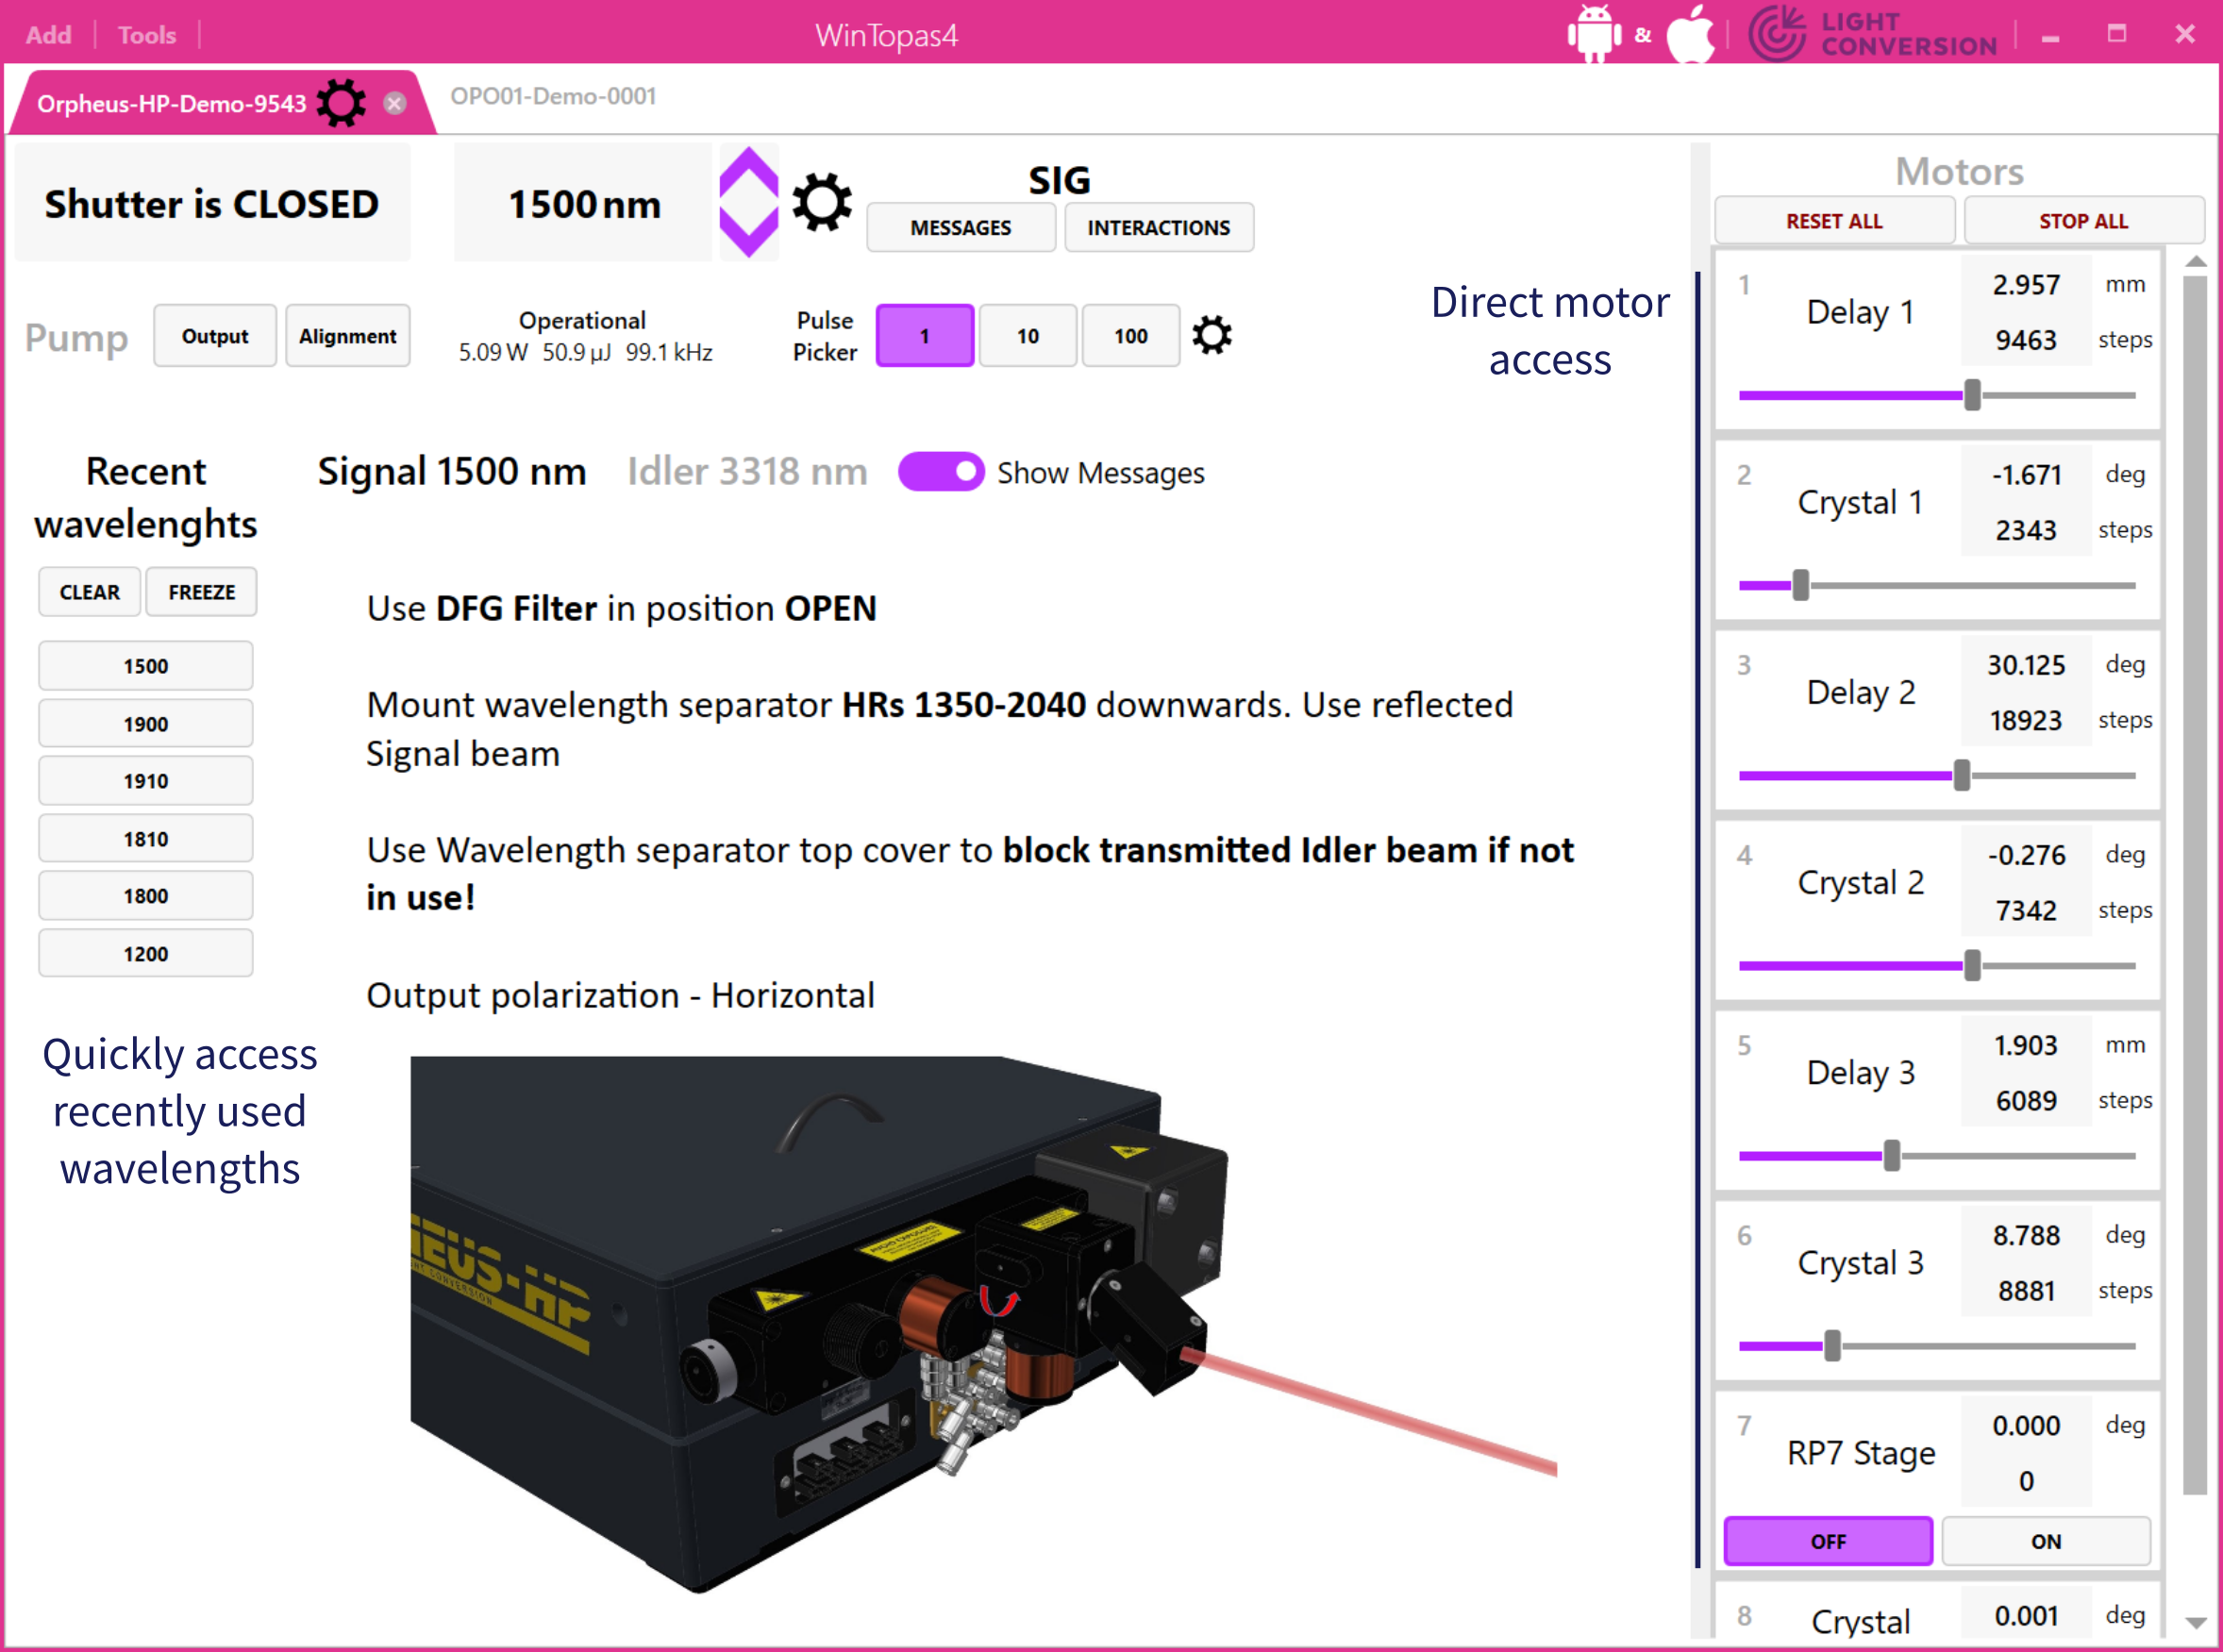
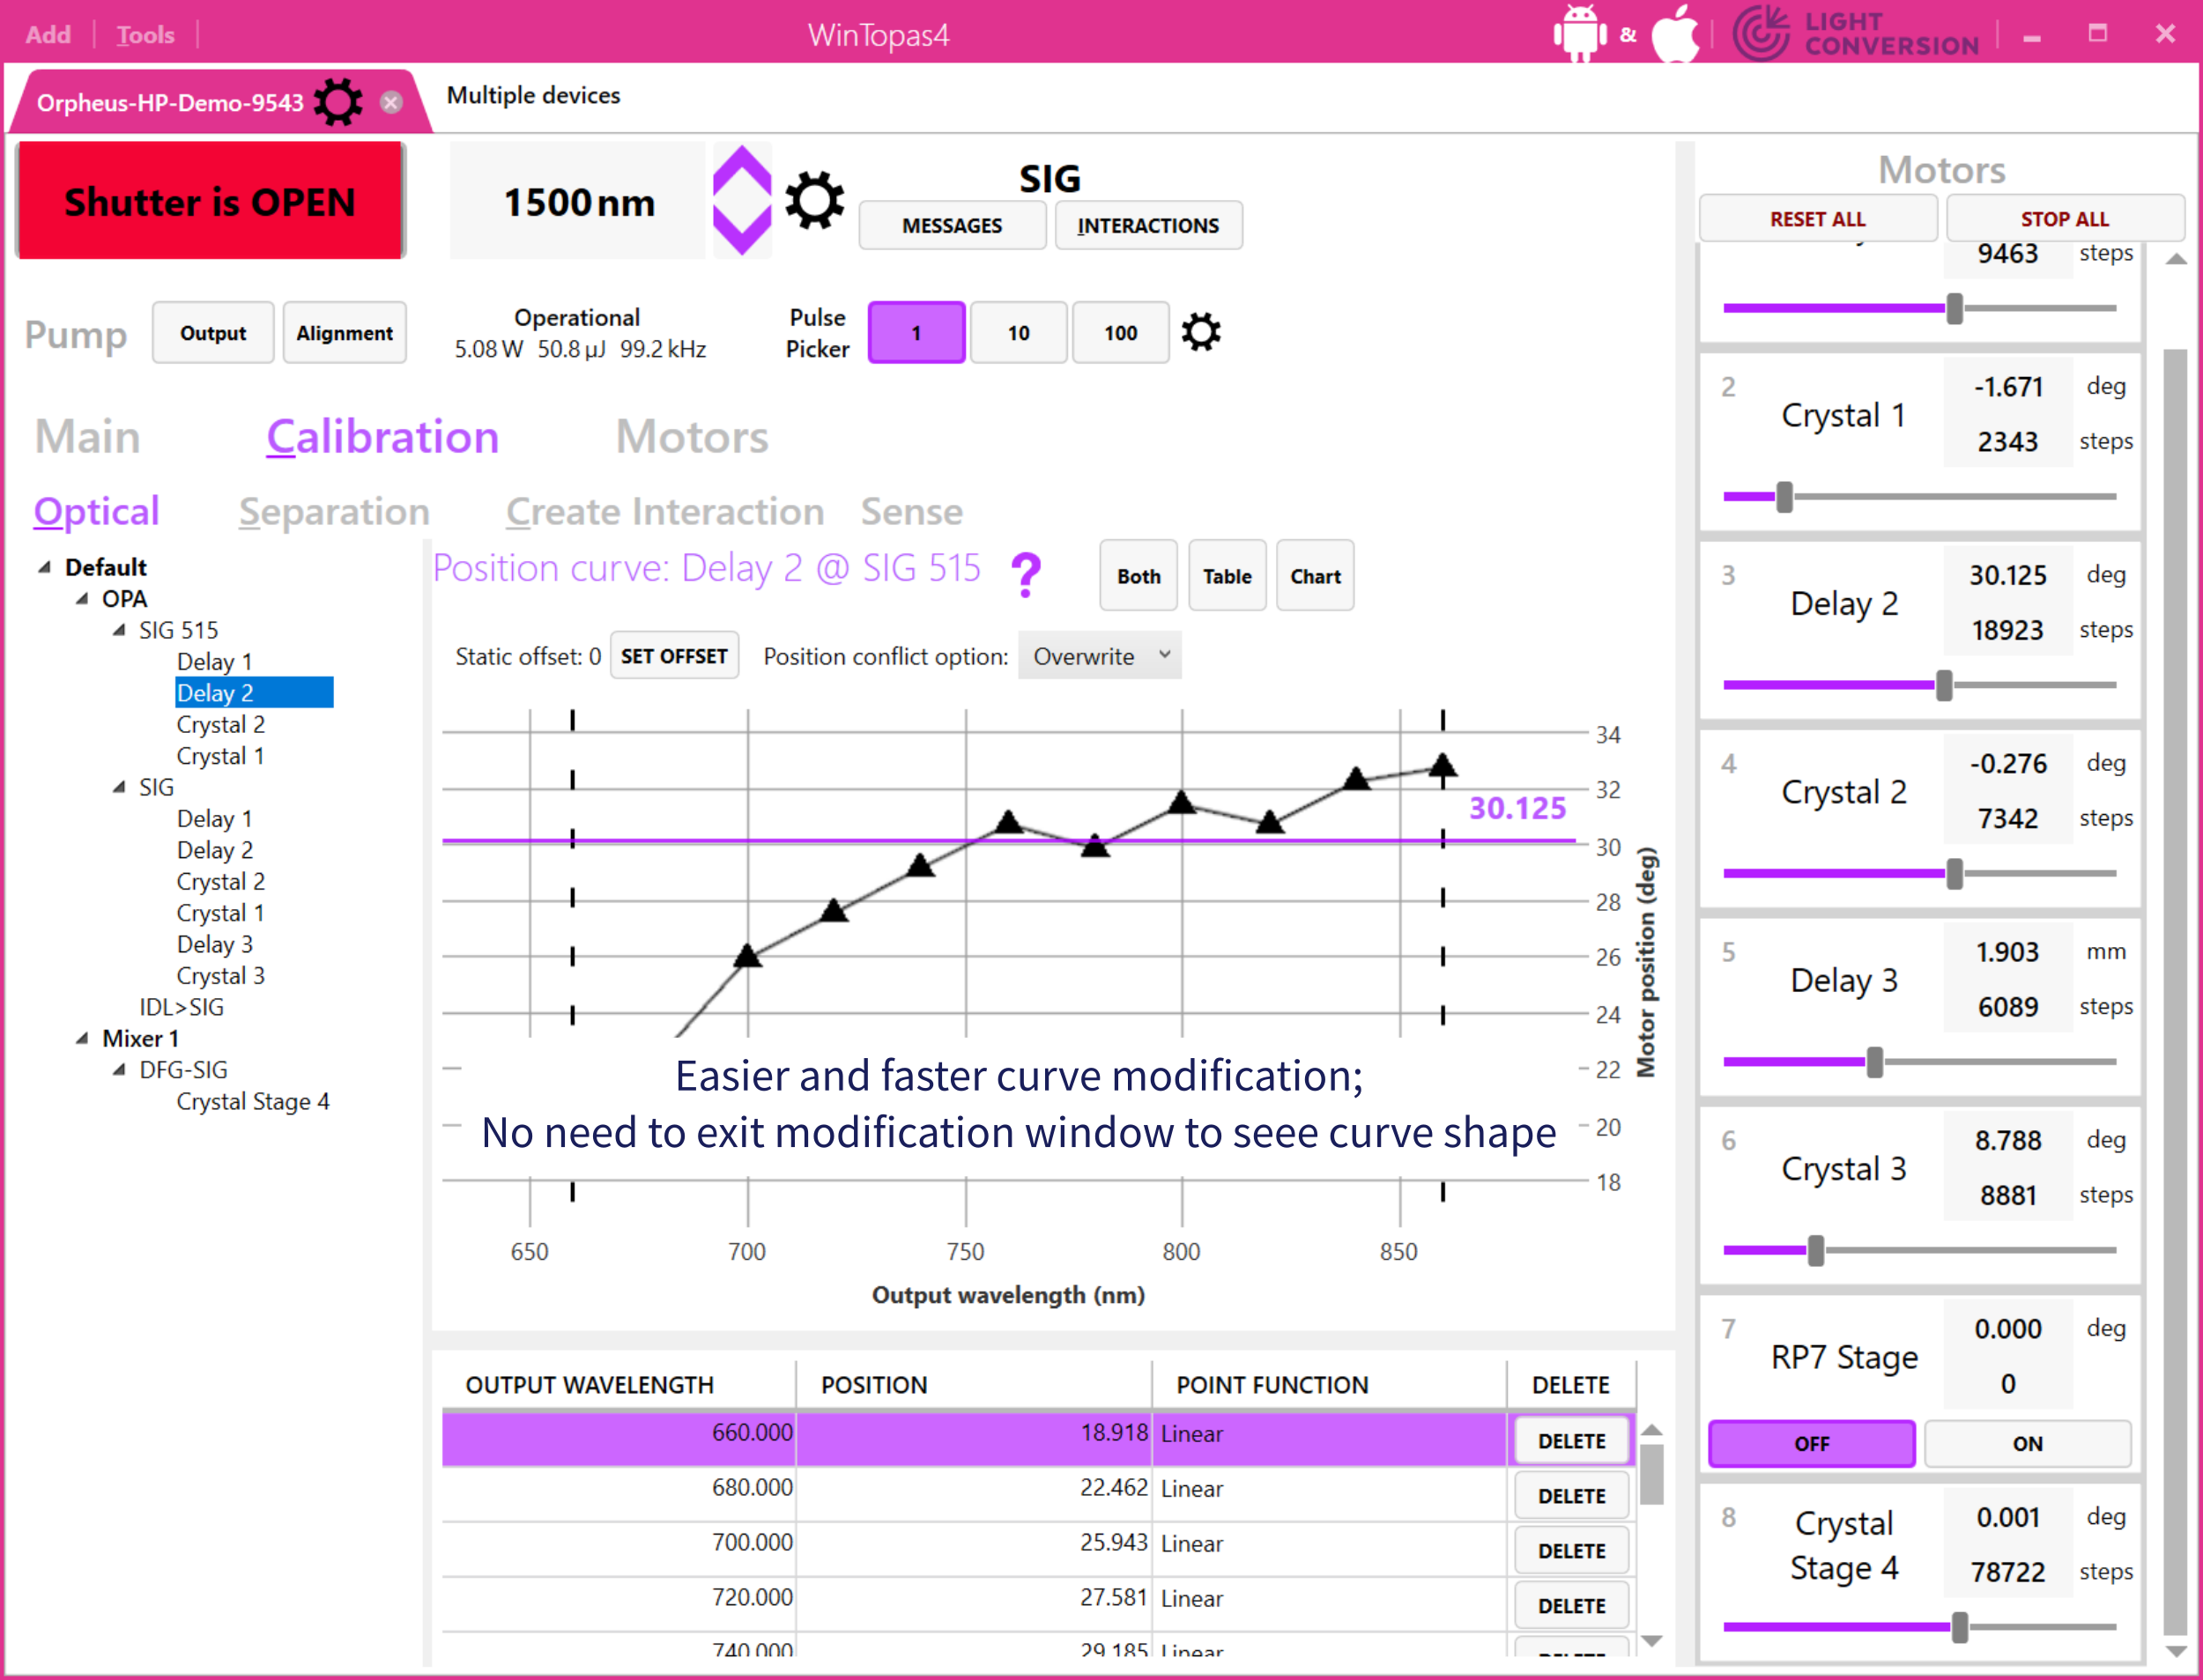
Access most often used functions quicker and easier!
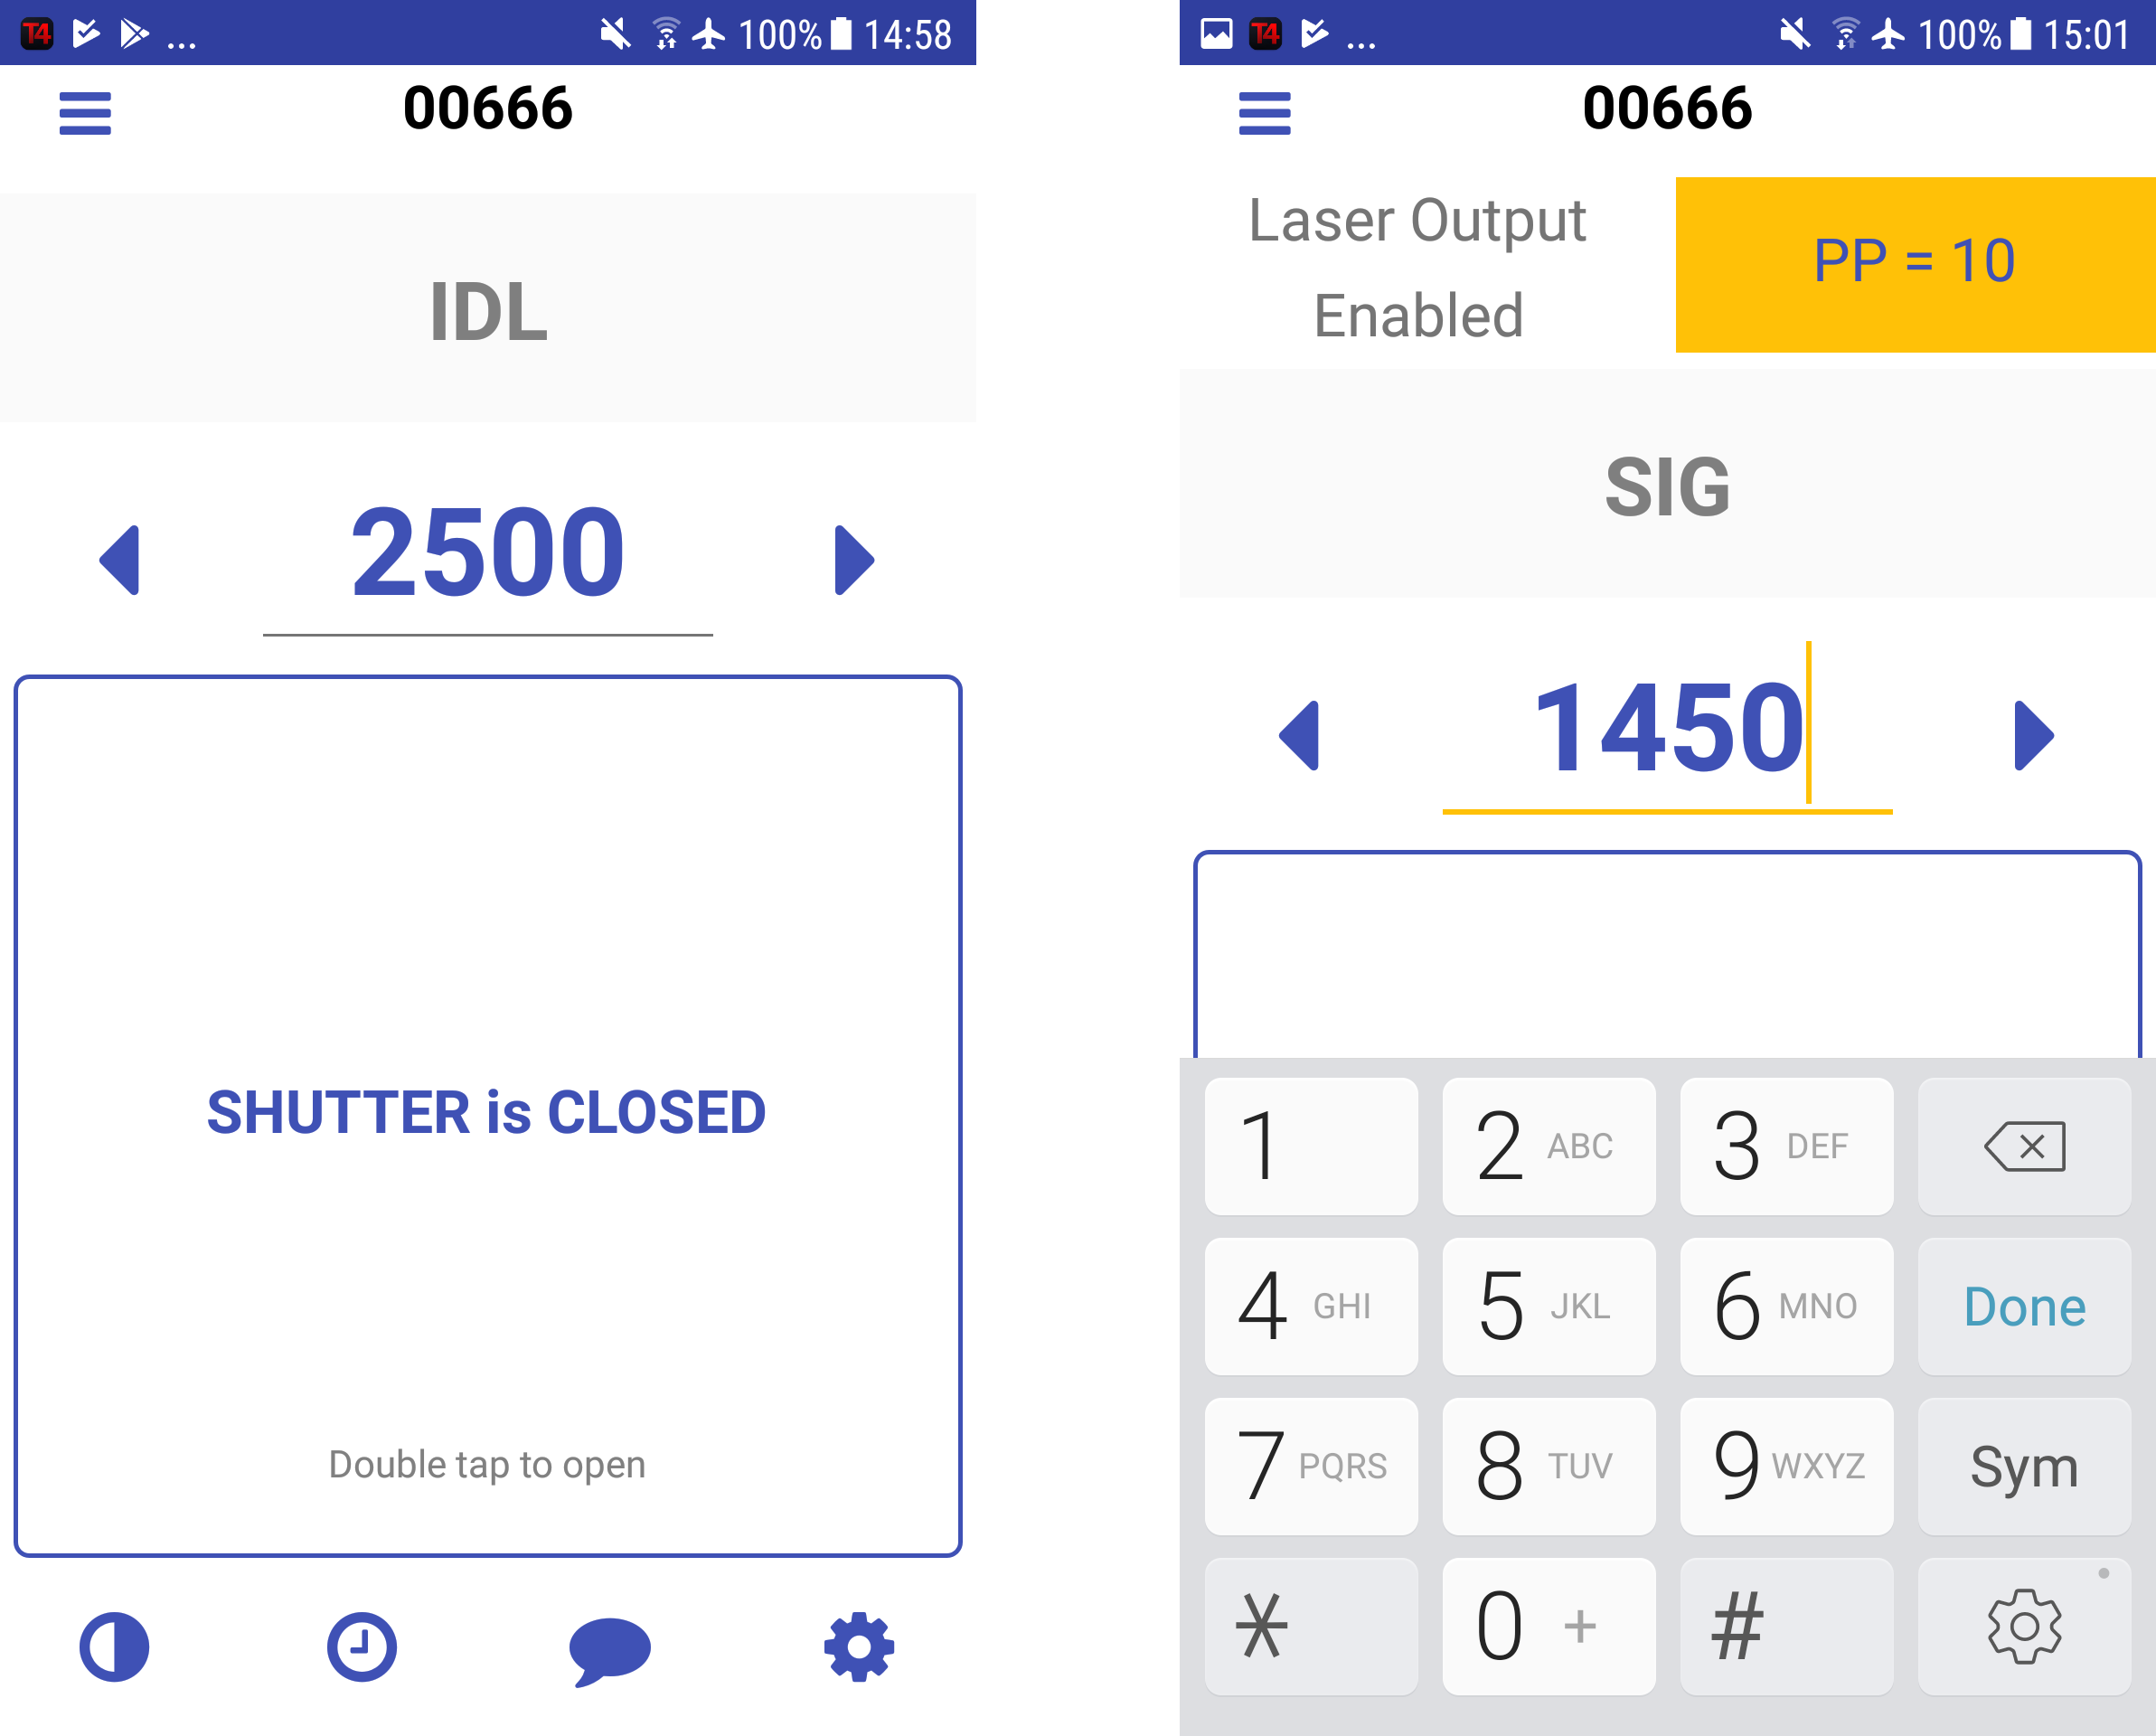
You can even control Topas/Orpheus from your smartphone
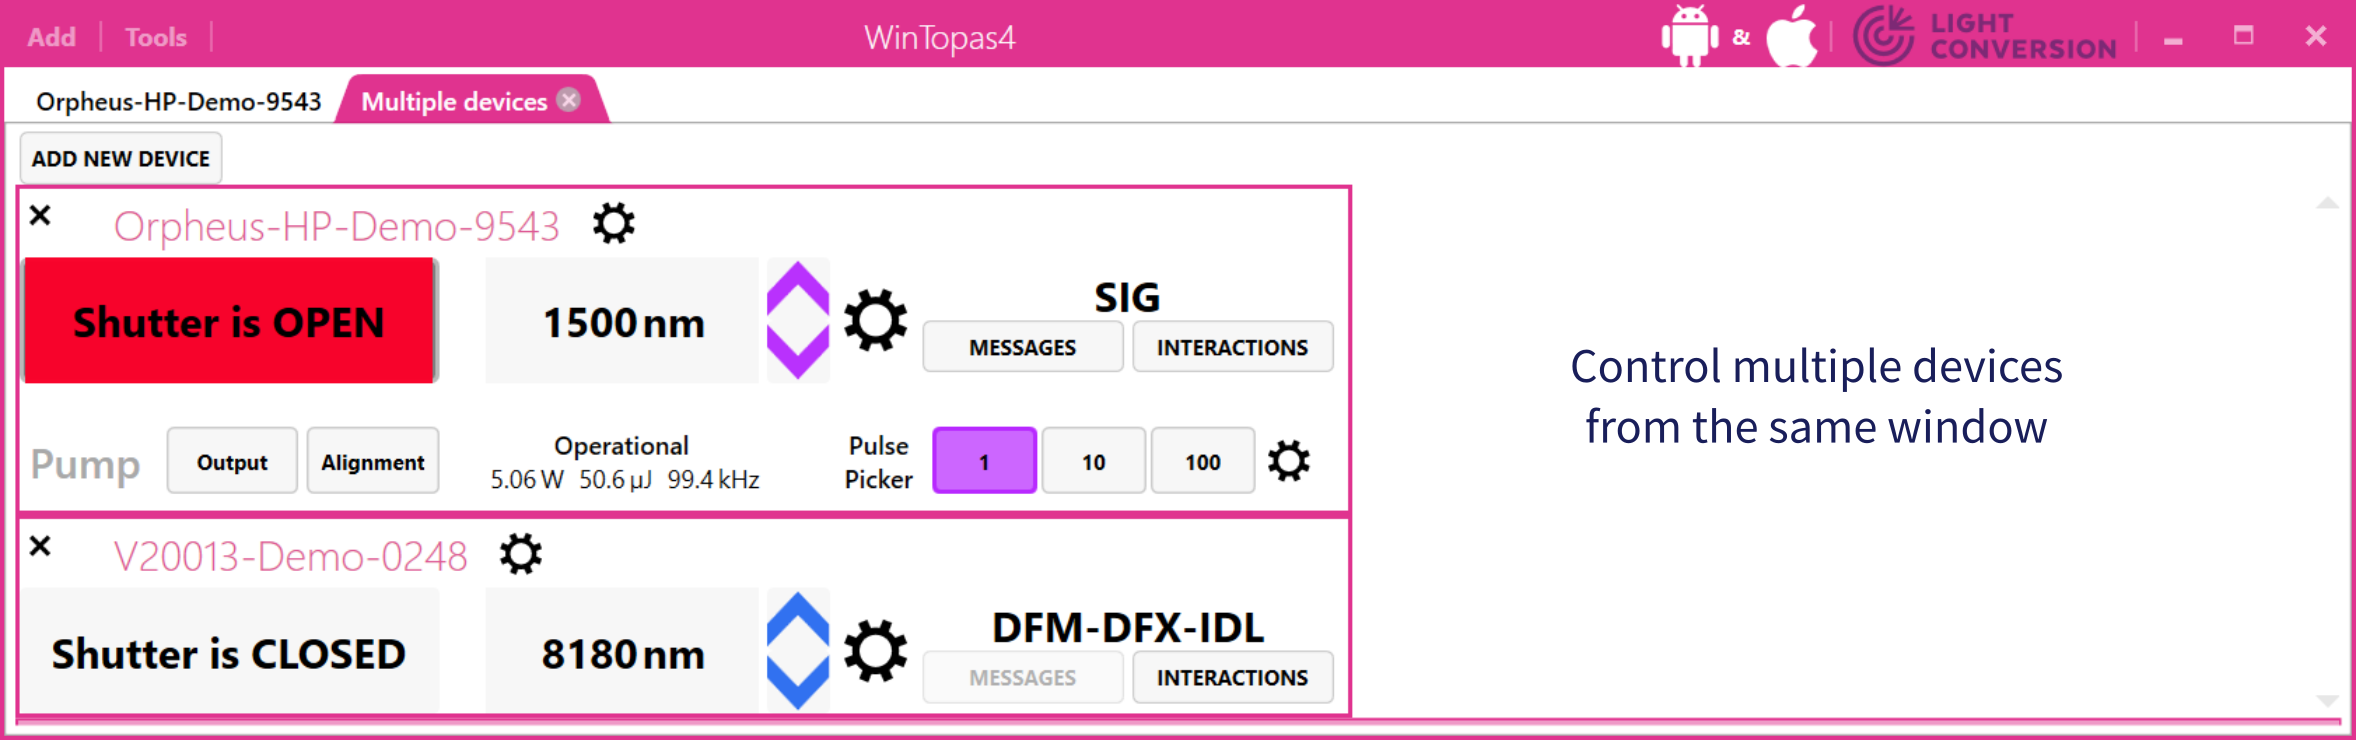
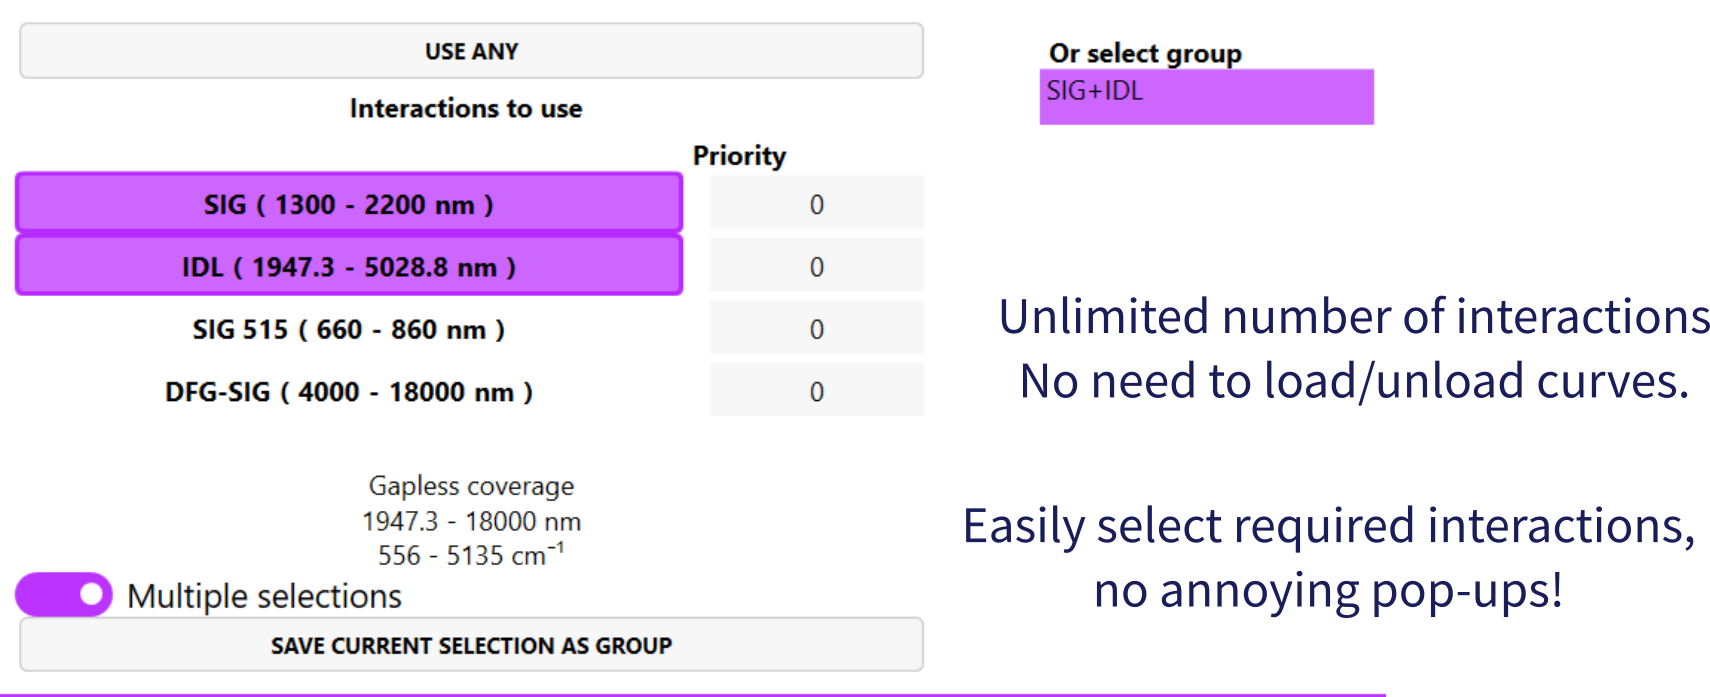
Better support for interactions with overlapping wavelength ranges
Smooth wavelength scanner: scan selected wavelength range to achieve quasi-broadband spectrum
And many other reasons:
- WinTopas4 looks great on high resolution, high dpi screens
- Non-intrusive automatic software updates
- Forbidden motor position ranges increase user safety and lower risk of accidental device damage (need to be configured after migration)
- Smart integrated device configuration backups every 15 minutes
- Extensive calibration sanity checks help to avoid common mistakes when creating/modifying interactions
- All upcoming features will be available only in WinTopas4
Instructions
System requirements
- Windows 7 or newer
- Administrator rights (for installation and first launch only)
- Topas control board with USB connection (LPT board is not supported)
- Topas/Orpheus device manufactured or serviced in 2011 or later (contact Light Conversion for earlier devices, as there might be conversion problems)
- It is recommended to use Topas4 software on the PC with internet connection for best user experience
Time required ~ 2 minutes
Case A. Installation on the same PC as WinTopas3 is currently running
Installation is non-intrusive, meaning that WinTopas3 will be able to function as earlier when WinTopas4 application is closed.
- Install WinTopas4 using default settings
- Close WinTopas3 application if running
- Launch WinTopas4 using icon on desktop
- Click ‘Tools>Access Level’ and enter the password for advanced user or engineer
- Click ‘Tools>Topas3>Convert Topas3 configuration’
- Select path to the WinTopas3 configuration .ini file from the combo box, click ‘Convert’, click ‘Launch server’.
- Click yes when Windows UAC prompts for administrator rights. Allow all applications through firewall.
- If you have multiple devices connected to the same PC, repeat steps 6-7 for each ini file.
- Enjoy! All motor settings and calibration curves have been imported!
Video for case A:
Case B. Installation on another PC
- Install WinTopas4 using default settings
- Get .ini and .crv files for the device that you want to use from the PC where WinTopas3 is currently running.
- Connect Topas USB cable to the new PC.
- Follow the steps 3-9 as in Case A. You’ll have to browse to the .ini files yourself in step 5 instead of selecting them from combo box.
Q&A
1. I have multiple .crv files for the same stage (e.g. Mixer2). I see that interactions have been imported only from the one of them!
You can easily import additional curves from .crv files after conversion. See video below.
2. Can I quickly return to WinTopas3 if something goes wrong?
Close Topas4 applications (especially servers, the green ones) and start WinTopas3. Reset all motors in WinTopas3. Any changes you made in WinTopas4 won’t propagate to WinTopas3 (and vice versa).
3. It looks like some interactions have lost calibration curves for some motors (e.g. SIG used to have 5 motor curves, and now only has 3). Is this is a bug?
If you inspect interaction under ‘Calibration>Optical’ you might think that not all motor curves have been imported. Instead, they have been imported and converted to separation configuration (‘Calibration>Separation’). You do not need to take any further steps, motors will move to correct positions when setting wavelength.
4. I see orange\red exclamation marks near ‘Calibration’ tab. What do they mean?
WinTopas4 performs sanity checks on calibration. Orange exclamation marks are used to denote possible mistakes and give suggestions. Red exclamation marks are used to denote 100% configuration mistakes. Hover over exclamation mark or click on it to read detailed descriptions what’s wrong and learn how to fix the issues.
5. After conversion some of the motors have named positions like ‘P 1678’. What does that mean? Can I change their names?
WinTopas3 to WinTopas4 converter tries to extract discrete motor positions from staircase-like calibration curves and give them meaningful names. This is not always possible, so some motors end up with the named positions like ‘P 1678’, which is simply motor position in steps when this position is set. See video ‘Rename named motor positon’ to learn how to give more meaningful names. Separation configuration will be updated automatically.
6. Are interaction comments from WinTopas3 gone?
Yes.
7. So where is WinTopas4 installer?
See the first step of the instructions above.